Thanks to Mr. Jonathan Harmon for suggesting this post. This is a post mostly for student’s using Notability at Jesuit College Preparatory. Teachers might want to use this a resource to show their students how to save and submit work created in Notability.
Step 1: Set Up Automatic Backup
First, make sure that Notability is set to automatic backup. Select the Gear in the lower left of the screen to open the settings.
Select Manage Accounts and log in to either Dropbox, Google Drive, or both. You can choose to backup through iCloud but this counts against your iCloud storage.

Next, select Auto-backup. Select the cloud storage that you want to use (Dropbox and Google Drive work well) and then configure the backup by selecting the gear next to the storage option you have chosen.
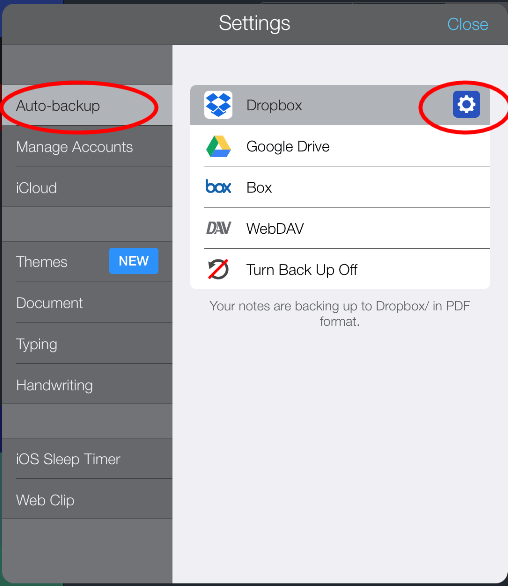
I would recommend that you select PDF as the format for your backups as this will retain as much of your formatting as possible and be viewable in a variety of platforms.

Step 2: Sending a Document
When you are in a note, you can send that note in a variety of ways. Select the Share Icon ![]() and then choose the option you want. If sending directly to a friend or teacher, you might use email. When there, select PDF as the type of document. If you are saving the document so you can turn it in, select your preferred cloud storage from the list. Then select the specific location and the format. Again, PDF is likely the best format to use.
and then choose the option you want. If sending directly to a friend or teacher, you might use email. When there, select PDF as the type of document. If you are saving the document so you can turn it in, select your preferred cloud storage from the list. Then select the specific location and the format. Again, PDF is likely the best format to use.

Step 3: Uploading to Moodle from an iPad
If you are to submit an assignment you created in Notability to Moodle, you first need it saved as a PDF and know where it’s located in your cloud storage.
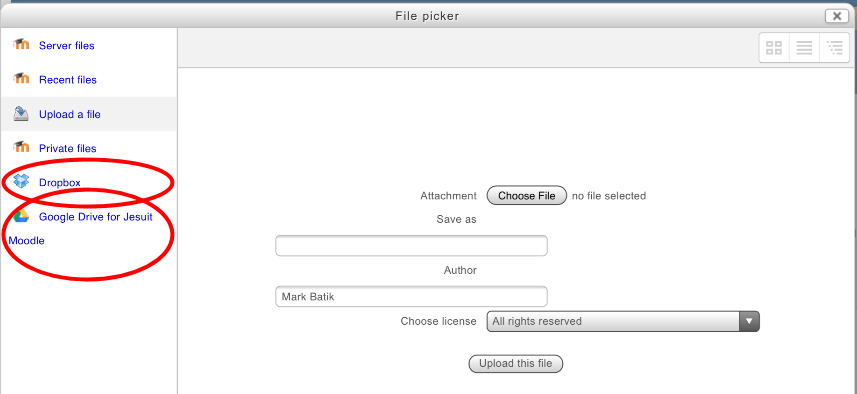
Now, open the assignment submission location in Moodle and select the button Add Submission.
Select the file submit icon.
![]()
Log into the cloud storage option where you document is saved. In Moodle, you currently can only do this from Dropbox and Google Drive.
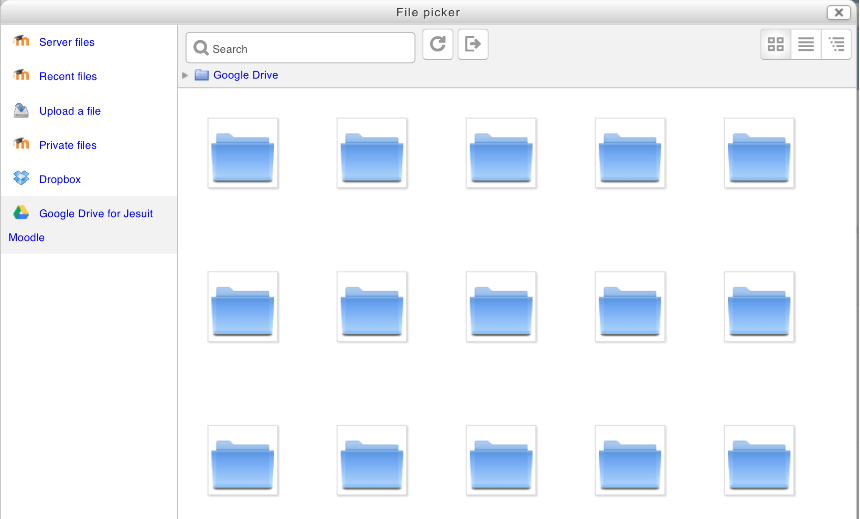
Pressing Login to your account will send you to a website where you will input your login credentials.
Once you are logged in, you should your folders and/or documents listed.
Touch select the document you are turning in and then press the Select this file button.
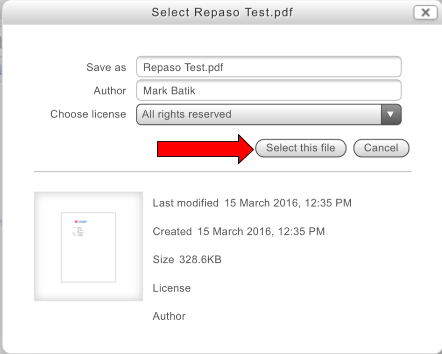
Finally, press the Save changes button and you have turned in your work.

You must be logged in to post a comment.